King’s Visualisation Lab, in the Department of Digital Humanities at King’s College London, has worked closely with the University of Texas at Austin and the Soprintendenza Archeologica di Pompei e Napoli to complete a navigable, three-dimensional digital model of Villa A at Oplontis, fully documenting its setting, architecture, and decor.
This interactive, real-time model was created between April 2008 and September 2011 with support from the University of Texas at Austin, the National Endowment for the Humanities, and the Leverhulme Trust. The model allows users to move freely through the Villa, and to link to the Oplontis Project’s integrated online database, containing extensive documentation of archaeological and archival sources. As well as being able to freely explore the villas’ architecture and appreciate the magnificent decor, a virtual visitor can also study the impact of lighting conditions at different times of day.
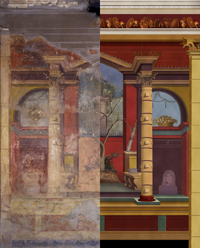
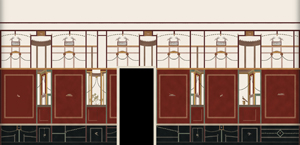
Below are just some of the many wall painting frescoes from the Roman Villa of Oplontis that have been digitally incorporated into the Villa of Oplontis Project by Martin Blazeby in the Department of Digital Humanities. Each fresco has been carefully photographed on-site and applied to the 3D model as a digital texture map. In addition, fully worked-up restored state versions have also been digitally generated allowing viewers to switch between the Villa’s current architectural state and a version with hypothetical restorations of its wall paintings. (For further information and a detailed account of the methodology and process involved in this aspect of the project please read the chapter *****). Click on the images below to see a slide gallery that shows the transition between each wall state.
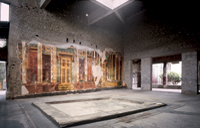
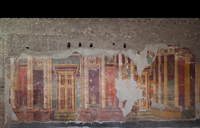
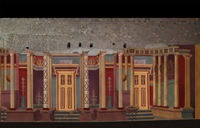
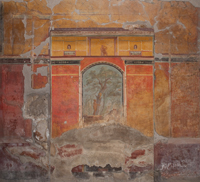
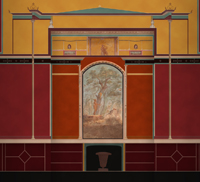
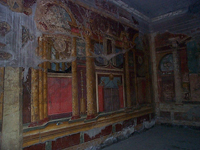
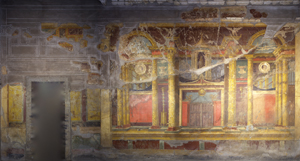
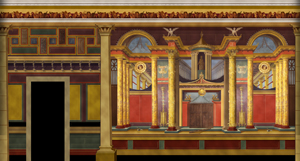
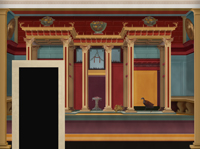
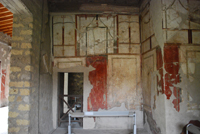
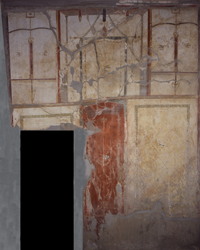
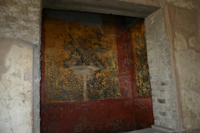
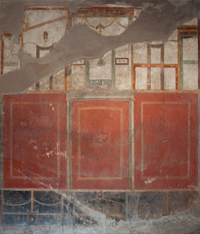
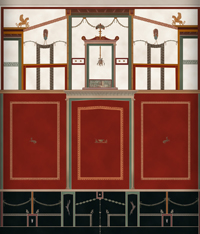
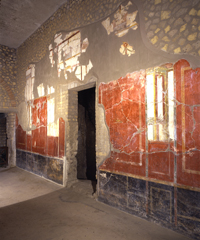
Room 8 east wall

|
|
 |
|
 |
|
|
|
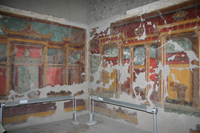
| Photograph of room 8 showing the room in context as viewied from the west doorway |
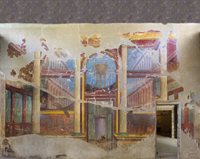
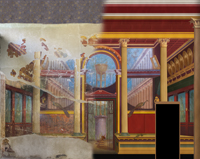
Photographic texture map of room 8 east wall in its current state |
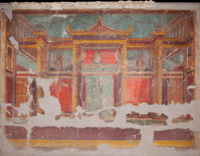
Digital texture map of room 8 east wall in its restored state |
|
|
|
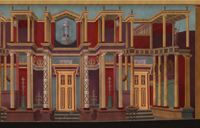
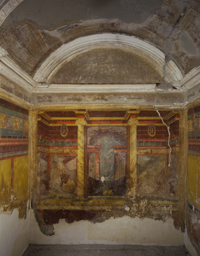
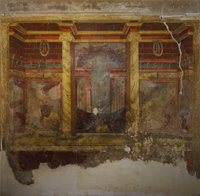
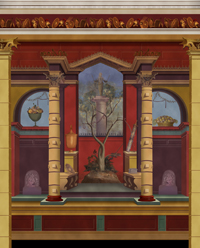
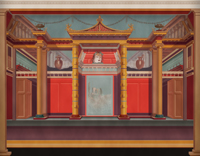
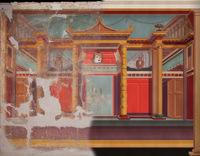
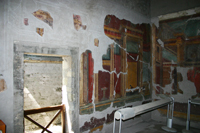
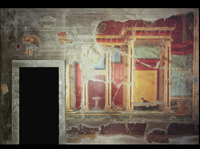
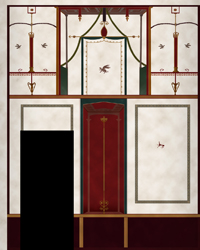
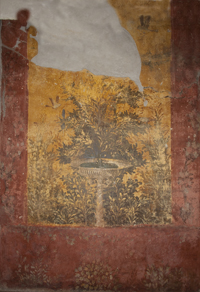
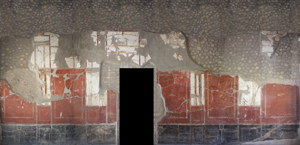
Room 11 east wall
 |
|
 |
|
|
|
| Photograph of room 11 showing the room in context as viewied from the west |
Photographic texture map of room 11 east wall in its current state |
Digital texture map of room 11 east wall in its restored state |
|
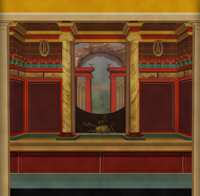
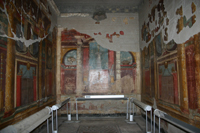
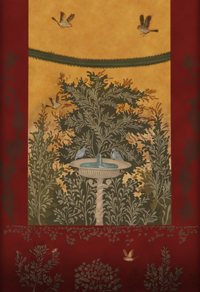
Room 14 north wall
|
|
 |
|
|
|
|
|
|
|
|
| Photograph of room 14 showing the room in context as viewied from the south doorway |
Photographic texture map of room 14 north wall in its current state |
Digital texture map of room 14 north wall in its restored state |
Room 14 north wall current and restored state comparison |
|
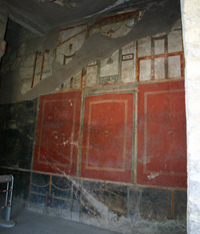
Room 14 west wall
|
|
 |
|
|
|
|
|
| Photograph of room 14 showing the room in context as viewied from the south doorway |
Photographic texture map of room 14 west wall in its current state |
Digital texture map of room 14 west wall in its restored state |
|
Room 15 east wall
|
|
 |
|

|
|
|
|
|
|
|
| Photograph of room 15 showing the room in context as viewied from the west |
Photographic texture map of room 15 east wall in its current state |
Digital texture map of room 15 east wall in its restored state |
Room 15 east wall current and restored state comparison |
|
Room 23 west wall
 |
|
 |
|
 |
|
 |
|
|
|
|
| Photograph of room 23 showing the room in context as viewied from the south east |
Photographic texture map of room 23 west wall in its current state |
Digital texture map of room 23 west wall in its restored state |
Room 23 west wall current and restored state comparison |
|
Room 23 south wall
 |
|
 |
|
 |
|
|
|
| Photograph of room 23 showing the room in context as viewied from the east doorway |
Photographic texture map of room 23 south wall in its current state |
Digital texture map of room 23 south wall in its restored state |
|
Room 41 west wall
 |
|
 |
|
 |
|
|
|
| Photograph of room 41 showing the room in context as viewied from the east |
Photographic texture map of room 41 west wall in its current state |
Digital texture map of room 41 west wall in its restored state |
|
Room 61 south wall
|
|
 |
|
 |
|
|
|
| Photograph of room 61 showing the room in context as viewied from the west |
Photographic texture map of room 61 south wall in its current state |
Digital texture map of room 61 south wall in its restored state |
|
Room 66 west wall
|
|
 |
|
 |
|
|
|
| Photograph of room 66 showing the room in context as viewied from the east |
Photographic texture map of room 66 west wall in its current state |
Digital texture map of room 66 west wall in its restored state |
|
|
|
Room 81 south wall
 |
|
|
|
|
|
| Photograph of room 81 showing the room in context as viewied from the north west |
Photographic texture map of room 81 south wall in its current state |
Digital texture map of room 81 south wall in its restored state |
|
All images are the property of Martin Blazeby and the Oplontis Project 2014. If you wish to use any of these images please contact: martin.blazeby@kcl.ac.uk
|